|
|
Techdude's
Claris Home Page
Tutorial
Lesson
3
Adding and
Positioning Graphics
|
Return to Techdude's
AMAZING links for budding web designers.
Adding and Positioning
Graphics
Now let's add a graphic to our page.
Position the cursor where you want the graphic to appear and
click on the button near the center of the button bar with
the circle, triangle and square on it  ,
the Insert Graphics button. A dialogue box
will open that will allow you to pick a GIF or JPG graphic
anywhere on your hard disk to place on your web page. If you
don't have a graphic ready, use this one: ,
the Insert Graphics button. A dialogue box
will open that will allow you to pick a GIF or JPG graphic
anywhere on your hard disk to place on your web page. If you
don't have a graphic ready, use this one:

|
Note: Borrowing graphics from
other web pages is almost too easy. If you are
using Netscape Communicator, just click on the
graphic above and select Copy from the drop-down
menu which will appear, then click on your web page
where you want the graphic to be placed and select
Paste from the Claris Home Page Edit menu. If you
are using Explorer, in Win95 or 98, right click on
the picture and hold down the mouse button until a
menu appears that will allow you to Copy the image.
Then simply paste the image into the Claris Home
Page window and follow the instructions below when
you are asked for the filename of the incoming
image.
|
As soon as you choose the graphic it
will appear at the cursor on your web page. You can also
drag a graphic file's icon from the finder on a Mac right to
the Claris Home Page window to place a graphic, if the file
is a GIF JPG or PICT file. In the case of a PICT file Claris
Home Page will automatically create a GIF file for you, when
you drag a PICT file icon to the Claris Home Page
window.
If your graphic is not already in GIF,
JPG or PICT format, Claris Home Page can still convert the
graphic to the GIF format for you if you have another
application on your computer that can open and display the
image. (Note: Be aware that GIF are files are more suitable
for art and drawings than for photographs because GIF files
can have a maximum of 255 colors. Most photographs contain
thousands of colors.)
To have Claris Home Page convert the
file for you, first you will need to open the graphic in the
application that created it or have it already in the Mac
Scrapbook or on the Clipboard. Once you have the graphic
open in another application, select it and then copy it to
the clipboard using the Copy command from the Edit menu. If
the Application supports drag and drop, you can simply drag
the picture to the Claris Home Page window. As soon as you
paste or drag the picture in, a dialogue box will appear
asking you to give the graphic a name. Name the file
something appropriate. Make sure the last four characters of
your file name are .gif
Ok, now you have your graphic on the
page. However, notice what happens if you try to drag or
move the graphic to the left
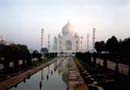
Taj
Mahal, Jewel of India
|
This
is example text. It doesn't really say
anything. It simply runs on and on,
without any real purpose, except to serve
as an example for this exercise. This is
example text. It doesn't really say
anything. It simply runs on and on,
without any real purpose, except to serve
as an example for this exercise. This is
example text. It doesn't really say
anything. It simply runs on and on,
without any real purpose, except to serve
as an example for this
exercise.
|
|
or right
Taj
Mahal, Jewel of India
|
This
is example text. It doesn't really say
anything. It simply runs on and on,
without any real purpose, except to serve
as an example for this exercise. This is
example text. It doesn't really say
anything. It simply runs on and on,
without any real purpose, except to serve
as an example for this exercise. This is
example text. It doesn't really say
anything. It simply runs on and on,
without any real purpose, except to serve
as an example for this
exercise.
|
|
of the first paragraph you typed. Or
to the right or left of the headline. Or perhaps inside the
table on the right or left.
Taj
Mahal, Jewel of India
|
This
is example text. It doesn't really say
anything. It simply runs on and on,
without any real purpose, except to serve
as an example for this exercise. This is
example text. It doesn't really say
anything. It simply runs on and on,
without any real purpose, except to serve
as an example for this exercise. This is
example text. It doesn't really say
anything. It simply runs on and on,
without any real purpose, except to serve
as an example for this
exercise.
|
|
Usually the results are not what you
want or expect.
This is why web designers use tables
to place things exactly where they want them on a web
page.
Let's modify our table to try to
establish a little control of our text and graphics
alignment. Click inside of the paragraph-table you created
and use the table Object Editor Ad Column Button to add a
column. A new cell appears to the right of the first
one.
Taj
Mahal, Jewel of India
|
|
This
is example text. It doesn't
really say anything. It simply
runs on and on, without any real
purpose, except to serve as an
example for this exercise. This
is example text. It doesn't
really say anything. It simply
runs on and on, without any real
purpose, except to serve as an
example for this exercise. This
is example text. It doesn't
really say anything. It simply
runs on and on, without any real
purpose, except to serve as an
example for this
exercise.
|
|

|
|
|
Select all the text and drag it into
the cell on the right:
Taj
Mahal, Jewel of India
|
|
|
|
This
is example text. It doesn't
really say anything. It simply
runs on and on, without any real
purpose, except to serve as an
example for this exercise. This
is example text. It doesn't
really say anything. It simply
runs on and on, without any real
purpose, except to serve as an
example for this exercise. This
is example text. It doesn't
really say anything. It simply
runs on and on, without any real
purpose, except to serve as an
example for this exercise.
|
|
|
Next, click on the Align Center button
to centre the table.
Now the table seems a bit narrow for
our purposes, so change the width of the table to say 480
pixels. Click on the graphic and use the Align center button
to center the graphic in the left cell.
Taj
Mahal, Jewel of India
|
|
|
|
This
is example text. It doesn't
really say anything. It simply
runs on and on, without any real
purpose, except to serve as an
example for this exercise. This
is example text. It doesn't
really say anything. It simply
runs on and on, without any real
purpose, except to serve as an
example for this exercise. This
is example text. It doesn't
really say anything. It simply
runs on and on, without any real
purpose, except to serve as an
example for this exercise.
|
|
|
Now try this. click on the line that
separates the two cells of the table and drag it to the
left, until the border around the top of the graphic is
about the same as the space at the side of the
graphic:
Taj
Mahal, Jewel of India
|
|
|
|
This
is example text. It doesn't
really say anything. It simply
runs on and on, without any real
purpose, except to serve as an
example for this exercise. This
is example text. It doesn't
really say anything. It simply
runs on and on, without any real
purpose, except to serve as an
example for this exercise. This
is example text. It doesn't
really say anything. It simply
runs on and on, without any real
purpose, except to serve as an
example for this exercise.
|
|
|
Then set the Spacing parameter of the
table to 0 to remove the space between the cells of the
table:
Taj
Mahal, Jewel of India
|
|
This
is example text. It doesn't really say
anything. It simply runs on and on,
without any real purpose, except to serve
as an example for this exercise. This is
example text. It doesn't really say
anything. It simply runs on and on,
without any real purpose, except to serve
as an example for this exercise. This is
example text. It doesn't really say
anything. It simply runs on and on,
without any real purpose, except to serve
as an example for this exercise.
|
|
Next we are going to add some text
under the table to expand on our topic. Do this; click
inside the inner table and add a row using the Add Row
button in the table editor. Then click inside the left cell
of the new table row that appears and click on the cells Tab
of the Table editor change the row color to white. Change
the Columns Span value to 2. This joins the two cell cells
of the new row together. Now you have a single cell in your
table that spans two columns like this: ( I have turned the
table border back on in my example to clarify the example...
you should leave the border off.)
Taj
Mahal, Jewel of India
|
|
This
is example text. It doesn't really say
anything. It simply runs on and on,
without any real purpose, except to serve
as an example for this exercise. This is
example text. It doesn't really say
anything. It simply runs on and on,
without any real purpose, except to serve
as an example for this exercise. This is
example text. It doesn't really say
anything. It simply runs on and on,
without any real purpose, except to serve
as an example for this exercise.
|
|
|
|
Now add some more text in the new cell
to fill out your topic. Here is the final result with all
the borders turned off:
Taj
Mahal, Jewel of India
|
|
This
is example text. It doesn't really say
anything. It simply runs on and on,
without any real purpose, except to serve
as an example for this exercise. This is
example text. It doesn't really say
anything. It simply runs on and on,
without any real purpose, except to serve
as an example for this exercise. This is
example text. It doesn't really say
anything. It simply runs on and on,
without any real purpose, except to serve
as an example for this exercise.
|
|
This
is example text. It doesn't really say
anything. It simply runs on and on,
without any real purpose, except to serve
as an example for this exercise. This is
example text. It doesn't really say
anything. It simply runs on and on,
without any real purpose, except to serve
as an example for this exercise. This is
example text. It doesn't really say
anything. It simply runs on and on,
without any real purpose, except to serve
as an example for this exercise.
This
is example text. It doesn't really say
anything. It simply runs on and on,
without any real purpose, except to serve
as an example for this exercise. This is
example text. It doesn't really say
anything. It simply runs on and on,
without any real purpose, except to serve
as an example for this exercise. This is
example text. It doesn't really say
anything. It simply runs on and on,
without any real purpose, except to serve
as an example for this
exercise.
|
|
Additional Exercise
Try to re-create the following example
using the techniques shown in this lesson. Tables, cells,
table background color, border width, and cell spanning were
all used in the example. (Hint: there are three inner tables
stacked on top of each other).
Taj
Mahal, Jewel of India
|
|
This is example
text. It doesn't really say anything. It
simply runs on and on, without any real
purpose, except to serve as an example for
this exercise. This is example text. It
doesn't really say anything. It simply
runs on and on, without any real purpose,
except to serve as an example for this
exercise. This is example text. It doesn't
really say anything. It simply runs on and
on, without any real purpose, except to
serve as an example for this exercise.
|
|
|
|
This is example
text. It doesn't really say anything. It
simply runs on and on, without any real
purpose, except to serve as an example for
this exercise. This is example text. It
doesn't really say anything. It simply
runs on and on, without any real purpose,
except to serve as an example for this
exercise. This is example text. It doesn't
really say anything. It simply runs on and
on, without any real purpose, except to
serve as an example for this exercise.
|
|
|
Note: Looking at the way
other designers have created pages is a great way
to learn new techniques. Mozilla Composer can open
pages directly from the web and reveal many of the
page designers secrets. All web browsers can save a
page as raw HTML, which you can then open in Claris
Home Page and then really proceed to discover some
of their inner workings.
|
This completes the formatting text and
graphics lesson. Now you have all the techniques you need to
take total control over the text and graphics on your web
pages. Tables are the key to that control. Think of tables
as an invisible grid to hold the contents of your web page,
determine its width and align the placement of your
elements. Even more importantly, tables allow precise
allocation of the white space surrounding your elements,
which adds to the visual impact and readability of the pages
you will create.
Return to Techdude's
AMAZING links for budding web designers.
|

